Here’s an interview with Don “the Dragon” Wilson on Entrvista.com
Author: White Dragon Warrior Society
-
The Most Costly Opponent
One of the biggest barriers to your accomplishments is probably procrastination. Whenever you hear yourself saying “someday” or “when I get time” or any number of delay tactic statements, you are procrastinating. If you let it continue, you will find yourself under constant stress and self-loathing. You may even start to dread things that you used to love.
Everyone becomes a victim to procrastination as some point in their lives. The sense of procrastination will often hold us back from our goals and prevent us from truly reaching our potential. There is, however, a way to combat it and allow you to come out on top.
Step 1: Identify if you really need to do the task
Often we find ourselves procrastinating over items we’ve tasked ourselves to do. Sometimes these items are critical but there are times when the things we try to do aren’t actually necessary. This ends up causing us undo stress and unnecessary burden.
So the first step to combatting procrastination is to be honest with yourself in identifying if the task is truly something that needs to be accomplished. If the answer is no then stop beating yourself up and let go of the task.
Step 2: Identify why you’re procrastinating
Once you’ve eliminated all the unnecessary tasks, you are left with the things that must get done. Now you need to go through each and clearly identify why you’re delaying. What is it about that job or task that is making you not want to accomplish it? Unless we face what we fear and dread, we will never be able to overcome it.
Step 3: Seek help
Often why we procrastinate is because we aren’t the expert in accomplishing the work or we don’t have the right skill set to do it. In other words, we’re beating ourselves up over something we just aren’t able to do in the first place. Stop hurting yourself like that and be open to seek help. There is nothing wrong with finding and receiving help. For instance, if you’re procrastinating on doing your taxes, maybe it’s worthwhile to find a CPA to help you.
Obviously you can’t get something for nothing in life so seeking help may involve returning something. It may not be monetary in nature. Thus, it’s important to consider what are your strengths and what can you offer to someone else that might be of value and help them with overcoming their procrastination issues. Create a win-win situation and both of you come out on top.
Step 4: Break it into bite-sized chunks
Bigger tasks can be daunting, even with the help of others. So the next step is to break the overall task into small subtasks. Make the steps reasonably sized that you’re able to finish the task quickly and efficiently. Then, focus your attention on the smaller tasks and you will find it easier to accomplish the overall job without even realizing it.
Step 5: Reward yourself
Don’t forget to reward yourself for overcoming the procrastination and getting the task accomplished. If the task is big, setup goals and milestones along the way that allow you to celebrate while you’re working through your bite-sized chunks. Pick an appropriate reward that makes sense and doesn’t end up causing you additional stress in other areas.
Procrastination can halt the progress of even the best person. Left unchecked it will trickle into other aspects of your life and begin to make you dread even unrelated things. Don’t let it stop you from accomplishing your dreams!
-
Heavy Bag
 Hitting the Heavy bag is a comprehensive cardiovascular and anaerobic workout that builds strength, stamina and quickness. Training with the heavy bag incorporates all of the body’s major muscle groups and is a functional exercise that can lead to better muscle balance and joint stability.
Heavy bags are filled with sand, water, or synthetic material, a heavy bag is hung with the top about a foot or two above your head. A good pair of handwrap will protect the bones and tendons in your hands from injury and provide support for the wrists. For small hands, choose 120″ wraps and opt for 170″ or longer for medium to large hands. Handwraps can be WASHED and reused, but if you train often you’ll want to invest in a few pairs.
Start wrapping at the wrists and work up the hands, remembering to keep the marked “this side up” to Velcro the wraps properly. Wrap the wrists and hands tight enough that the wraps are firmly in place but not so tight that they impede circulation. Lastly, find a good pair of bag gloves. Bag gloves are perfect for a brisk session with a heavy or speed bag, but are not appropriate for sparring. Bag gloves protect the hands and can offer limited wrist support, depending on the model. Leather gloves are a superior choice because of their durability, and you’ll want gloves that secure with Velcro unless you have a partner to lace your gloves for you. Push your fingers into the gloves as deep as they will go and wrap them around the internal bar for a proper fit.
The proper fighting stance for right-handed boxers is to put your left foot three to six inches in front of your right, lean forward with 60 percent of your weight on the balls of the feet, and stand with your feet hip-width apart. The knees are bent with kneecaps roughly even with the balls of the feet. The upper body should be loose and the shoulders should be slightly in front of the hips. Point your left shoulder toward your target. Keep your chin down and your hands up around your chin or cheeks. Test your stance by asking someone to give you a push; you shouldn’t stagger in any direction.
You can improve your overall quickness, agility and coordination with speed training on the heavy bag. Try training in one-minute intervals, throwing continuous combinations of four or more punches at a time. The key in speed training is to throw as many punches as you can as fast as possible with proper form. Lightly pepper the bag with jabs, straight punches, hooks, and uppercuts– save the heavy hitting for power training.
The most basic speed drill is the “outside drill,” where you circle the bag and throw jabs with your front hand and then move to combinations by adding straight punches with your back hand. After your interval is up, take a 30- to 60- second breather.
Power bag training increases your punching power and overall strength with intervals of hitting the bag as hard as possible while maintaining proper technique and form. You will run out of energy much faster when power punching than in speed training. For power training on the heavy bag, punch 15 to 25 repetitions or in 30-second intervals with a minute of rest in between. Try the “inside drill,” where you get close to the bag and throw only hooks and uppercuts, bobbing and weaving in between punches. As your stamina increases, increase the workout time and decrease the rest interval.
It always helps to have a certified coach around for at least your first few heavy bag sessions. The heavy bag is not forgiving on the joints if your technique is off. Start slow in practicing fighting bag techniques to avoid injury, and remember that it takes hours of repetition to develop sound form.
“I firmly believe that any man’s finest hour, the greatest fulfillment of all that he holds dear, is the moment when he has worked his heart out in a good cause and lies exhausted on the field of battle – victorious” Vince Lombardi
-
Pai Lum Tao Books Available NOW
Two new books written by Glenn C. Wilson on Pai Lum Tao are available NOW! No martial arts book collection is complete without these volumes. Each book is only $24.95, plus S&H.
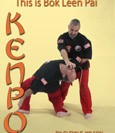
This is Bok Leen Pai Kenpo
Grandmaster Glenn C. Wilson gives an in-depth look into the history and techniques of Bok Leen Pai Kenpo. Follow the development of this powerful, fascinating system as Grandmaster Wilson takes you from its birth in China, through Asia to Hawaii, and finally to the legendary Great Grandmaster Daniel K. Pai as he brings Bok Leen Pai Kenpo and his Pai Lum Tao family of martial arts to the mainland of the United States. With 16 chapters covering fist sets, forms and other techniques as well as 325 photos, some very rare, this book is a must-have for any serious student of the martial arts.
This is Pai Lum Tao’s Internal Hand
There are 207 pages of enlightenment and a journey through the internal arts of Pai Yung Tai Chi Chuan, Quan Nien Chi Kung and more. Hundreds of photos will guide the reader through this peaceful voyage. There is detailed instruction and photos demonstrating the ‘old style’ Yang Short Form, Penetrate the Wind form and the rarely taught Quan Nien Buddhist Chi Kung Form series 1 through 6. This is certainly a very rare opportunity for any person to elevate their knowledge of the internal arts.
All books ordered through the Society will be signed by Grandmaster Wilson!
You can also order these books from the distributor: This Is Bok Leen Pai Kenpo This is Pai Lum Tao’s Internal Hand -

Speed Training with the Double End Bag
The double end bag is one of the more challenging fight training techniques that you can work on. That’s because the double end bag has a far greater range of motion and a greater scope of unpredictability than even the speed bag. Looking on the bright side, they are cheap and easily installable, meaning you can get all of the benefits of one while fight training.

You get all of the coordination and speed benefits of the speed bag, while increasing the intensity and difficult level and adding in defensive training, footwork and technical form.
Stand in front of a double end bag and flick a couple of jabs to the center of the bag. Notice the rapid bouncing motion. Throw a few more with various levels of power, follow through and even come from different directions so you begin to understand how the double end bag works.
Once your comfortable and loosened up a bit, begin working some combinations on the bag. Always keep your eye on the middle of the bag, not on the ropes, not straight ahead but dead center on the bag itself. This will help improve your accuracy. Circle the bag as if it were a sparring opponent, and keep your guard up high and your form tight.
If you step in closer than a full arm’s reach from the bag you’ll also be able to practice your defensive speed and maneuvers. Throw a quick shot and duck under or move away from the returning bounce of the bag itself. Step back in and alternate throwing shots and avoiding the incoming rushes of the bag.
As you’re practicing these fight training techniques, stay consistent with all of the standard training principles in terms of using a three minute round with a one minute break. I usually like fitting in my double end bag training after my heavy bag work and before my speed bag work.
You’ll be able to find your double end bag in a variety of different sizes and shapes. Diameters start usually at 5 inches and extend to 9 inches, and shapes range from spheres to a speed bag shape to a double speed bag shape. The smaller the bag, the more difficult the training will be.
Spontaneous adaptability is the key to a warrior’s survival……
-
Go Outside Already!
With all the nice weather, I hope you’re taking advantage of this great opportunity to extend your training to the outdoors. Being outdoors is a wonderful experience when training Martial Arts. You get a sense of being closer to nature and the world around you. In addition, it teaches you some valuable lessons on how to handle different terrains and situations… all of which will heighten your understand of yourself.
The Setup
Pick a day or time to accomplish this. Make sure you’re not rushed and you can truly take the time to appreciate what you’re about to do.
Pick a form/kata/routine. Choose something you’re familiar with and can practically do in your sleep. The last thing you’ll want to do is stop to think about the basics. This is a time to explore beyond just learning the steps and movements.
Pick a location. Find somewhere where you have lots of space. If you’re uncomfortable about having an audience, pick somewhere isolated.
Absorb and learn from your surroundings
The ground beneath you
Consider the location where you picked. What is the surface like? Chances are if you’ve been practicing inside the whole time, the outdoor surface will be very different. Even a simple grassy field can pose different challenges. The earth is not smooth. It has ridges and rocks, dips and folds.
On grass
If dry, it’s crunchy under foot. If green, it’s probably at a different temperature from the air around it. The grass hides the earth beneath. It could be soft and muddy or hard and rocky. You won’t know until you step down. Depending on the length and type of grass, it could tickle against your feet, trying to distract you as you move. Can you compensate for these things? Can you keep going?
On rocks
Much of the coastal area around me are rocky. Rocks pose a different challenge from grass. You can see the mounds of rocks and their unevenness. But visual cue is not always enough and the path is not always linear. Maneuvering on rocks requires you consider your next move and plan how you choose to step. You must adjust your step and balance to the surroundings and compensate for the gaps and rises.
On sand
Sand is one of my favorite surfaces to walk on. Regardless of if the sand is wet or dry, your feet naturally sink into the surface and you need an extra effort to make the next move. When working in sand, you have to be careful you don’t twist too quickly or move without first breaking the grip the sand has on you feet.
On water
I love working in and around water because there’s natural energy that fills the air around any body of water. With that being said, working on the water poses its own challenges. Not only is every slippery and you need to be conscious of where and how you step, water has its own flow and movement. Working in water is a great test of balance in the presence of forces pushing against you. But for all the struggles, water is also great to work in if you pains or struggle to move in certain manners under full gravity.
The air around you
Beyond the surface, being outside means dealing with the environment. Is it cold? Is it hot? Is it sunny? Is it windy? Each of these different environmental changes can impact how you perform even the most basic of forms. Understanding your personal limits in these environments and how you compensate for these distractions is a powerful lesson in understanding yourself.
The sounds and smells
When we’re training, we primarily use our sense of sight and touch. Being outside provides us with a unique opportunity to develop our other senses. As the air drifts in and out, we are introduced to new sounds and smells that we wouldn’t have found on our training floor. Allow oneself to become aware of all this helps to build a total body training.
Enjoy your training
So as we enjoy the nice weather, don’t forget to take the opportunity and train outdoors. Become closer to nature and the roots of your Martial Arts and gain a better understand of yourself and your style.
-
10 Easy Steps for Beginners
1. Adjust bag to proper height. The belly (the fattest part) of the bag should be level with your mouth or chin. Many people hang their speed bags too high, and this will result in unnecessary muscle strain and poor technique.
2. Get in the “standard” speed bag stance. Face the bag with your feet apart at about shoulder width. Your whole body, from your feet to your head, should be facing the bag, and your shoulders should be squared up with the bag. You should be near enough to the bag that you don’t need to extend your arm more than a few inches to hit it, but far enough from it so that it won’t hit you in the head on the rebound.
3. Hold your fists up at chin level or just slightly below, and raise your elbows up so that they are almost parallel to the ground. Your arms should be bent in at about 90 degrees, and both your upper arms and your forearms should be nearly parallel to the ground.
4. Execute a front circle punch. Extend one fist to punch the bag lightly. You should be able to extend your fist straight out or just slightly up to strike the belly of the bag in the front (the part that is facing you directly), and you want to make contact with the bag with the side or heel of your fist—ideally, you will contact the bag with the side of your little finger near the first knuckle).
5. Circle your fist down and back to the starting position, all in one smooth motion. Once you strike the bag, immediately circle your fist back. The circle should be small: just large enough to bring your fist back into position near your chin.
6. Count the rebounds of the moving bag. After an odd number of rebounds, the bag can be hit again. After striking forwards, the bag will rebound off of the back of the platform (rebound “1”). When the bag swings back toward you it will rebound off the platform again (rebound “2”), followed by the bag swinging back away from you and rebounding off the platform on the far side again (rebound “3”). As you become faster it will be difficult to see the rebounds, but you will still be able to hear them.
7. Strike the bag again as it’s tilted away from you. You can use the same hand or the other hand. Strike the bag after the third rebound, as the bag is returning toward you. You should make contact with the bag while it is still tilted away from, ideally when it is tilted at about a 45-degree angle from the board. This punch restarts your “1-2-3” count, and you can continue in this same cadence with as many punches as you like.
8. Combine a straight punch with a front circle punch. Start in the same starting position as above, but drop your elbows a bit so that they are angled slightly toward the ground but still held away from your body. This will allow you to execute a right straight punch. Punch the belly of the bag, making contact with the front knuckles of your fist. Punch “through” the bag so that your arm crosses your chest. Meet the bag on the third (or other odd-numbered) rebound with a circle punch that comes up, strikes the bag as it tilted away from you, and then proceeds to carry your arm back to the starting position in one fluid motion. This is the most basic speed bag combination, and it can be repeated over and over with one fist, or you can alternate fists.
9. Change the fist that is punching every two or three punches. After a circle punch with one fist, follow with the straight punch of the other.
10. Move your feet and swivel your hips. When performing combinations or alternating between fists, you should move your body, not just your arms. For example, suppose you do a straight punch – circle punch combination, alternating between the right and left fists. When you throw your right straight punch your right leg should come forward a bit, and your hips should swivel in the direction of the punch. As you return you fist to the starting position by throwing a right circle punch, your hips should swivel back and right foot should swivel back as well. This puts you into position to throw your left straight punch, during which you’re left leg, will move forward, etc
-
More than Just a Teacher
When we put on our black sash/belt for the first time, we should remember that we are more than just a teacher. As the younger students begins learning, they also begin taking note of our actions as well. To some we will be only a teacher, to others we may become more of a role model or mentor. Which means they will see you in a whole different light, because they will want to be more like you. Do the things you do, act like you, or even mimic the things you might do. This could be a good thing, or it can be a bad thing, depending on the character of the teacher. We not only teach them a martial art and how to defend themselves, so that they will gain confidence in their ability, we also teach them how to be one of good integrity and morals. This means you also become a person of influence in their lives as well.
So like the old saying goes, “we must practice what we preach”. If we are only of good character and integrity in the school, and not in our personal life as well, then we fail that student and the essence of our art and family. It’s an honor to a teacher and the system they train in, when the student represents his teacher and family so well, that everyone knows who their teacher and/or style is by the way they carry themselves. (The apple don’t fall far from the tree)
You may not want to believe it but there are more eyes on you than you know, when you are not aware of it. Wearing that black sash/belt has more responsibility to it than just saying, I’ve completed all the requirements for it, it carries much more. Now you have to do things on a different level to handle the responsibility that comes with that sash. Carrying yourself in a manor that is respectable, both in and out of the school, because what you represent is not left in the school when you walk out the door, it’s outside the door as well. The student should not only respect the rank, but also respect the person wearing the rank.
Young minds are impressionable minds and what they see in you may make a big impression on them. What we say, what we do, and how we teach will say a lot about the person wearing that black sash/belt. Make sensitivity, caring, and humility apart of your character, because each student will be motivated differently, and we all have to be sensitive to that. With that said, ask yourself which of these qualities am I missing, and how do my students see me.
Am I more than just a teacher?
-
Don’t Let Fear Stop You
Fear keeps us from our full potential. If we can identify our fear and understand why we have the fear, we have a chance at overcoming it. Most fears are learned, meaning something happened to us or we reflected upon something and that has made us afraid.
Recently, my fearless baby girl became afraid of bees. It didn’t happen immediately. In fact, she wasn’t even conscious those pesky things were flying around her until one decided to bite her… in the face.
Oh the tears were flowing. But even worse than seeing her face puff up was to watch her afterwards. Now, all flying bugs were evil and out to get her. If even a fly landed on or near her, she’s start up in a panic. My fearless girl had become afraid.
In her case, it was easy to see and identify the point at which she was afraid. Many times, we don’t know exactly when we became afraid or what changed our perspective. The key to understand, everyone fears something (even SiTaiGung). It is natural and a way of life.
Fear is actually a good thing. It’s the body and mind’s defense mechanism to help prevent it from injury. Obviously in my baby’s case, she was injured the bug bite and it wasn’t something very positive. Now, her fear and desire to run away from any flying bugs is a defense mechanism to try to prevent that unpleasant event again.
Overcoming your fears is not forgetting you have them. On the contrary, it’s acknowledging them and allowing yourself to fear. But it also involves a level of self-awareness that you must practice. When you know you’re about to do something you fear, try these steps:
- Acknowledge your fear (at least to yourself). Don’t be afraid to admit to yourself that you’re afraid. The worst thing you can do is ignore your body’s own defense mechanism. It can lead to greater issues in the future.
- Calm yourself. Normally when we start to become afraid, our heart races and our breathing shortens. The key to being able to overcome our fear is to being able to calm ourselves and let our minds think again. Use your meditation techniques and bring some level of peace back to your system.
- Seek to understand the source of your fear. What exactly are you afraid of? If you take a moment to reflect deeper on what is the driving force of the fear you will be able to overcome it. For instance, with my baby the fear is in the sting not the fly. Properly placing the source of your fear is the key to getting an understanding of it.
- Establish the right precautions. Once you’ve established what you’re afraid of exactly, you can establish some precautions to prevent that exact action. Make sure the precautions make sense and are reasonable to obtain. So, in my baby girl’s instance, I can’t simply put her into a bubble and never let a bug touch her again. That would be impracticable and hurt her in other ways. What I can do is teach her the difference in the bugs and try to help her understand how to avoid the ones that hurt her. Will she get stung again? More than likely; but she will also start to realize that the sting isn’t as bad as her fears are now.
- Repeat the process and evaluate how you feel. Did your precautions help lessen your fear? You will still fear what you’re doing. Don’t run from it or assume it will magically go away. But be honest with yourself if what you’ve done is enough to get you through your fear and allow you to move forward.
Fears aren’t necessarily a bad thing. It is possible to overcome your fears. The steps outlined above may seem at first quite lengthy but as you become more aware of yourself, you will be able to do these things quicker and with better results.
Taking a quote from one of my favorite books, Dune.
I must not fear.
Fear is the mind-killer.
Fear is the little-death that brings total obliteration.
I will face my fear.
I will permit it to pass over me and through me.
And when it has gone past I will turn the inner eye to see its path.
Where the fear has gone there will be nothing. Only I will remain.
~Litany Against Fear -

Best Medicine Ball Exercises for San Shou
Russian Twists: Take a seat on the floor, as if you were in the up position of a completed sit-up. Hold a medicine ball with both hands in front of your body, and then elevate your feet several inches off the ground. Also lean back so you’re upper body is at a 45 degree angle to the ground. Twist your body and swing the medicine ball as far to the right as you can, then repeat the movement to the other side. Do your best to maintain your balance, and complete 20 repetitions on each side per set. If your feet touch the ground or you fall back just resume the position and continue on.
Lying Toe Touches: Lie on your back and hold a medicine ball with both hands, with your arms stretched out behind your head. Raise your legs so they are at a 90 degree angle to the floor. Raise the medicine ball overhead and touch your toes with it, lowering the ball slowly and keeping your arms extended straight the whole time. Complete 12-20 repetitions per set.
Medicine Ball Crunches: These are simply crunches done while holding a medicine ball for added weight and resistance. Hold the ball with both hands at chest level, but don’t rest it on your body. From the starting position with your back on the floor you only need to raise yourself about six to 12 inches off the ground.
Lopsided Push Ups: Assume a standard push up position, and have a medicine ball in between your two hands. Now push it to your right, and place your right hand on top of it. Perform five pushups in this style, then push the ball to your other hand and perform another five. Complete as many repetitions as possible.
This is one of the best medicine ball exercises for upper body strength, and it adds a lot of difficulty to a standard push up. It will also help with your body’s coordination and stability.
Squats into Shoulder Presses: Hold the medicine ball at chest level in front of your body, standing straight up. Squats all the way down to the ground, pause for a second and then return to an upright position. As you do so, press the medicine ball over head to move into a shoulder press exercise. Complete 20 repetitions of the entire movement per set.
360 Degrees of Medicine Ball: Stand straight up and hold a medicine ball with both hands, with your arms hanging straight. Tighten up your core, and then begin forming a giant circle with the medicine ball in front of your body, always keeping your arms fully extended and straight. Complete 10 repetitions clockwise, and then complete another 10 repetitions counterclockwise. It’s a very effective medicine ball routine for hitting all of those hard to reach abdominal and core muscles.
We generally recommend opting for a 10 or 12 lb medicine ball for San Shou training. This provides you with enough resistance to really build some functional strength, but it’s also not too heavy so you can utilize your tool for a greater variety of workouts, and you can build stamina as well.
-
Who inspires you?
It’s never too young or old to be inspiring. All it requires is for you to open your eyes and truly want to help.
Today I am highlighting an 18-year-old young man, Mitchell Allen, who will be representing Martial Arts as he runs the torch for the upcoming summer Olympics. While he isn’t a Pai Lum Tao student, his story is inspiring nonetheless and well worth highlighting.
At the age of 14, Mitchell Allen coached a five-year-old boy with spina bifida in judo. He went on to do over 2000 community hours and started up 2 judo clubs in his area to coach men, women and children both with and without disabilities. He has received many local and national forms of recognition for community work.
This Saturday, young Mitchell and his sister will receive one of the highest honors a non-competitor can, carrying the Olympic torch towards its final destination in London, England. His sister, who battles with a crippling form of childhood arthritis, has also pushed through her limitations to become an accomplished judo student and dancer.
But what makes both of them so great is that neither started their efforts because they wanted to get recognized. Rather, the saw others around them that needed their help. They gave from the heart and made a difference in the lives of those around them. They helped to inspire the community to reach out and are role models for those around them.
So as we go into Memorial Day weekend, take a moment to think about those in your lives that have inspired you. How did they do it and what did they do for you? Thank them, if you can. And then consider how you might inspire others to greatness.
We are each but one person, but together with a warrior’s heart, we can all make a difference in the world.
Happy Memorial Day weekend everyone!
-
How the Avengers are like Pai Lum Tao
 Have you seen the Avengers movie yet? Are you a fan of their comics?
The one thing I love about this movie and the characters is the fact that all the heroes are some of the most unlikely heroic figures you can get. But they all have one thing in common… (say it with me) hanna.
That’s right, their heart is what set them apart and made them the heroes they became.
Thor
Thor started out with a desire for glory, to win the honor of his father. But even with this selfish pursuit, he had a loyal heart, loving his fellow warriors like they were his own brothers and sisters. “… forgetting all categories…”
Iron Man
Iron Man is the playboy of the team. He had the money and the influence but not the direction. His heart wasn’t into anything until he realized how precious life was and how he had squandered it away. “The warrior is a man who dedicates his life to the cause which Made him what he is.”
Captain America
Captain America was the smallest and weakest man. But that didn’t stop him from wanting to join the army and help his country. Despite all obstacles, he never gave up trying and kept on wanting to be better and to help. He got his chance and never gave up on his fellow men. “… dedicated to defend the honor, the creed, the pride, and the self-respect for what he wishes to be called…”
Hulk
Hulk our beloved big, green guy was a brilliant man and scientist who never thought of becoming a superhero. Yet, circumstances were forced upon him and have changed his life forever. Now, he must struggle and find balance in his emotions or risk losing control all together. “… letting energy that wishes to exist, exist… go forth to seek the Tao and the void. Understanding myself and finding peace within.
What do you think? Do you agree? I’d love to hear your thoughts below.